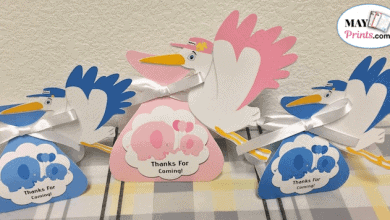
Today, I will be teaching you how to make stork baby shower party favors. If you are out of ideas then you can add this to your baby shower party.
It is a cute little party favor for you to put any kind of candies of your choice that will fit in the clear plastic box.
This party favor shows how much you appreciate your guests for coming to your baby shower party. The design has a message saying ” Thanks For Coming! ” on both the back and front.
Will you be patient enough to make this cute little stork delivery baby shower party favor?
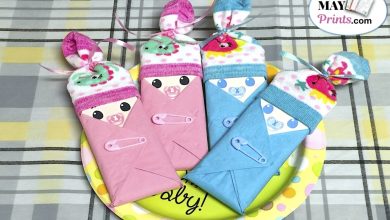
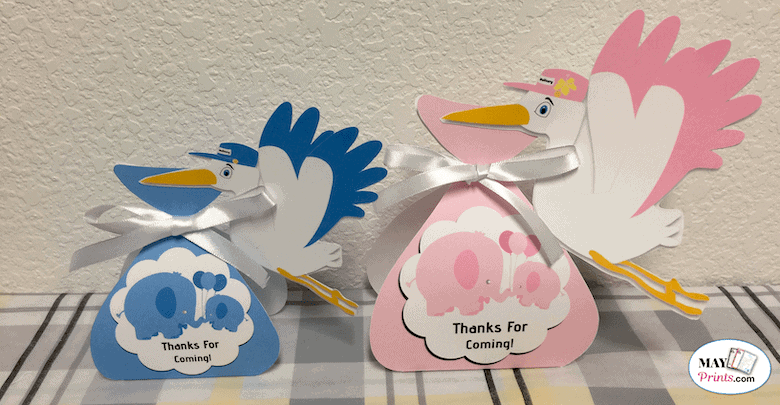
Oh yeah by the way, you can select between the sizes of this party favor to make. You can choose the options to make a bigger one or a smaller one. You may be able to see the difference with the feature image on the top of this article. The blue one for the boys is the smaller and the pink for the girls is bigger.
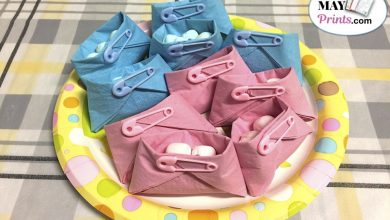
The bigger one can hold more candies since the plastic box will be bigger versus the smaller one. The big plastic box can hold up to 27 mints and the smaller one can hold up to 13 mints. Just to let you know I am referring to the mints that I was using for the demo on the video.
![]()
Items you will need to make a small Stork favor:
- Stapler – You should use a stapler with a long reach, not like a small one.
- Ruler – You can pretty much use any kind of ruler that is long enough to get the job done.
- Scissors – Any kind of scissors that cut really good.
- Satin ribbon – The ribbon should be around 16 inches long. The one I am using is white color and you can also use blue if it is a boy baby shower. The kind that I am using I bought from amazon and you can click here to check it out. It’s the one that’s multicolored in 2/5″ wide size with 600 yards.
- Bone folder – This is used to fold the necessary parts. This is the one I am using.
- Candy – You can use any kind of candy of your choice, like m&ms and mints. You can find the blue mints by clicking here and pink mints on here. These mints taste very good. My kids keep stealing them, and before I know it they are all gone and I can’t even use them to make videos without buying more. :o).
- Clear plastic box – This is to hold the candies. You need to get them in 1.5″ x 1.5″ x 1.5″. You can get it here.
- Printable Stork and wrapper – You can get the printable stork and wrapper by clicking here for the baby boy design and for the baby girl design click here or if are planning to do a gender reveal in your baby shower party then click here for both boy and girl designs.
- Card stock paper – To print the stork and wrapper, it is required to use card stock paper in either size A4 (8.27″ x 11.69″) or US letter (8.50″ x 11.00″) . You can click here to read more about the US Letter (8.50″ x 11.00″) and here for the A4 (8.27″ x 11.69″).
- Glue – I guess you can use any kind of glue that sticks to it. The one I am using is a clear glue stick.
- Double sided tape – If you don’t have it, you can get it here.
Items you will need to make a bigger Stork favor:
The only things that are different from the above required items are:
- Clear Plastic Box – 2″ x 2″ x 2″. It can hold about 26 to 27 mints. You can get the 2 inch box by clicking here.
- Card stock paper – You will need to get US Legal paper in the size of 8.50″ x 14.00″. You can get it by clicking here and this is the card stock paper I was using for the demo video.
- Printable Stork and wrapper – You can get it here for the boy design, and for the girl design by clicking here and also for both genders by clicking here.
DIY Stork For Baby Shower Video
Please do watch the below video to see how it is done. To be honest, I usually prefer watching a video to reading the written instructions.
Yes, I am more of a visual person. If you like you can do both. By doing so, it will re enforce your understanding and you’ll be less likely to make mistakes.
Besides, the video is not that long. It is around 8 minutes long.
Instructions
Here are the written instructions on how to make this stork baby shower favor. The only challenge making this baby favor is cutting out the wrapper and the stork. It requires a little bit of time to get it done.
Despite that, it is still very fun to make it. At least I enjoy making it. Besides, it will look super cute in your baby shower party.
Step 1 – Please carefully cut out the printable stork and wrapper.
Step 2 – Place whichever side of the wrapper down on the table in front of you.
Step 3 – Place a ruler on the white line and use a bone folder to draw a couple of times on the white lines. Do the same with the other white line. Yes, you need to do this with a total of two white lines. This will make it easy to fold it and it looks much better on the folded part.
Step 4 – Next turn the wrapper over and try to fold it with the tail facing toward the top. Do the same thing for the other side as well.
Step 5 – Put some of your favorite candies in a clear plastic box if you haven’t done so already. For the clear plastic box and mint candies that I am using in the size of 1.5″ x 1.5″ x1.5″ for the demo, it can hold about 10 to 13 mints.
Step 6 – Make a T shape with the double sided tape in the middle of the clear plastic box filled with candies on the bottom part of the clear plastic box. Make sure you don’t do this on the top part of the box where you should be able to have access to the candies.
Step 7 – Then place the clear plastic box on the middle of the wrapper and press it down for a couple of times by using one of your hands. This is to prevent the plastic box from sliding off or out of the wrapper.
Step 8 – Align both tails together nicely and use a stapler to staple them together in the middle of the edge. It might be a little easier to hold the corner of the tails to staple them together.
Step 9 – Next use a satin ribbon of your choice to tie a bow tie around the place where you staple the tails together. This is to make it look much nicer and to cover the staple. I use a white color satin ribbon in the video. You can also use a blue color one to match the blue elephant design. If you are making a girl design then you can use either white or pink color satin ribbon.
Step 10 – Next I will use some clear glue to stick the stork on top of the tail of the wrapper. Be sure to not put too much glue. By doing so, the glue will spread out of the stork’s beak and it won’t look as nice with glue sticking out on the wrapper.
Step 11 – Have a lot of fun and enjoy your baby shower with your family and friends.
If you are interested in using this stork baby shower favor to do a gender reveal in your baby shower party click here to find out how.